Unknown's avatar

Calling All DIY Brides ~ Make Your Special Day a Little Brighter with this Sparkling Accessory!

Dog with wedding ring

What a cutie bear helping to keep the ring safe and sound.

This sweet picture was from Jason Webster Photography.

Wedding season is in full bloom and to help all of the DIY brides out there, I have a instructions for you on how to make a gorgeous Swarovski crystal head band. Make your special day a little brighter with this sparkling accessory!

DIY Swarovski Crystal Wedding Head Band Steps

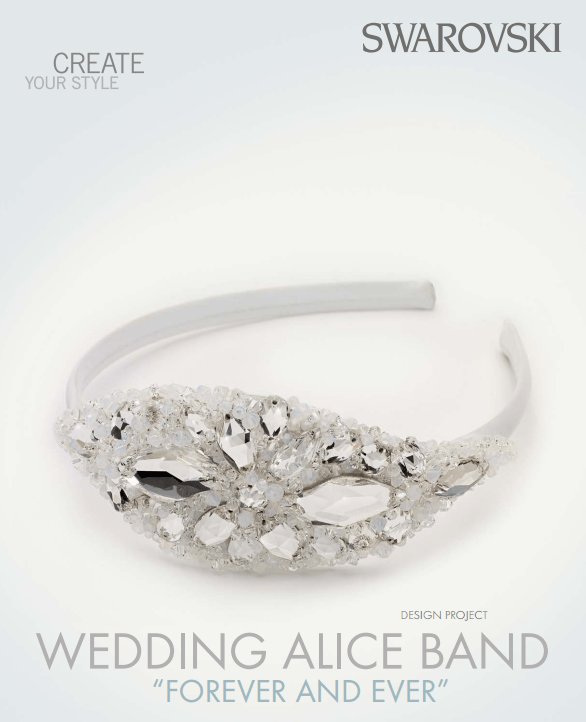
Love is old, Love is new, Love is all, Love is you. With grace in your heart and a vintage-inspired Wedding Alice Band embellished with Swarovski crystals on your lustrous locks, you can be anything you want to be on your wedding day —boho chic, beautiful bride, and belle of the ball.

Swarovski crystals

Swarovski Crystal Style 3223 – 18x9mm Nevette Sew-on Stone 4 pieces of Crystal

Swarovski Crystal Style 3230 – 12x7mm Pear Sew-on Stone 10 pieces of Crystal

Swarovski Crystal Style 3254 – 20x9mm Leaf Sew-on Stone 4 pieces of Crystal

Swarovski Crystal Style 3254 – 30x14mm Leaf Sew-on Stone 2 pieces of Crystal

Swarovski Crystal Style 3288 – 8mm Xirius Sew-on Stone 2 pieces of Crystal
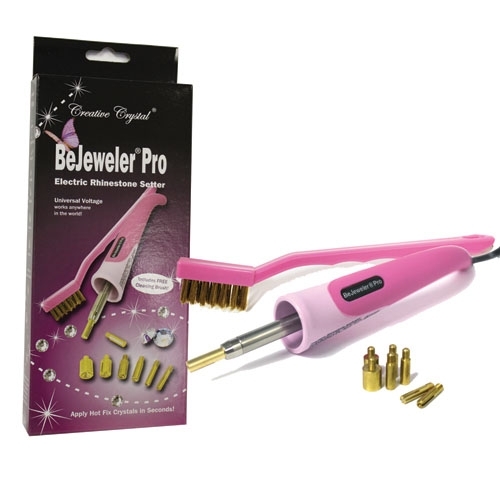
Supplies & Tools

Alice Band (covered with white fabric), white Leather, white 14x10cm Leather Glue (Gütermann creative HT2), Nail lacquer, white Nylon thread, transparent, 0.15mm Tools, Double sided tape, Scissors, Sewing needle, Sheet of paper, A4

Step by step instructions are at the bottom of the visuals.

DIY Swarovski Crystal wedding Head Band Piece Step 1

DIY Swarovski Crystal wedding Head Band Piece Step 1B

DIY Swarovski Crystal wedding Head Band Piece Step 2

DIY Swarovski Crystal wedding Head Band Piece Step 3

DIY Swarovski Crystal wedding Head Band Piece Step 3A

DIY Swarovski Crystal wedding Head Band Piece Step 4

DIY Swarovski Crystal wedding Head Band Piece Step 4B

DIY Swarovski Crystal wedding Head Band Piece Step 5

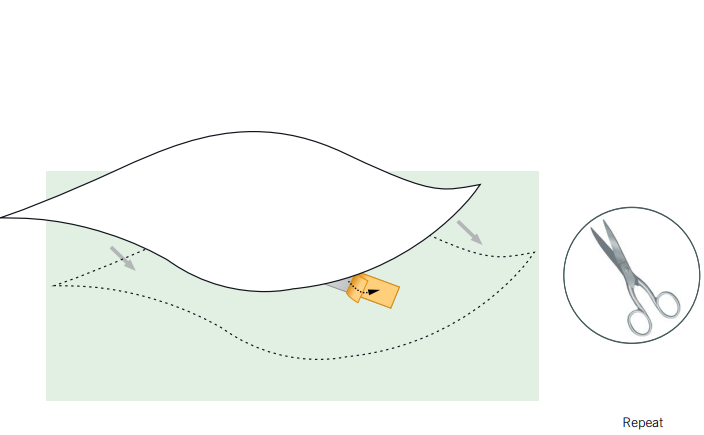
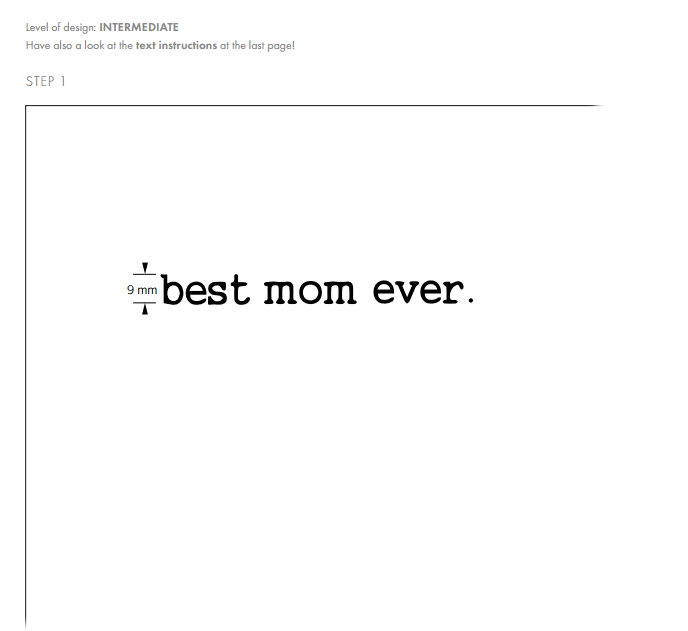
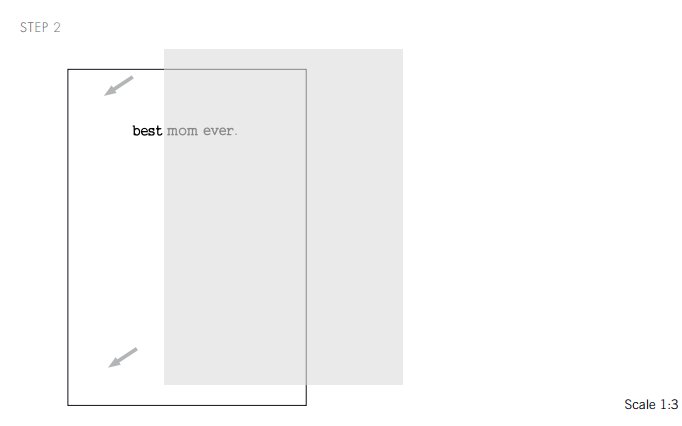
STEP 1: Print and cut out the pattern to the size shown in the illustration. Repeat this step once making the second pattern 1mm larger than the first one. Adhere one of the patterns to the leather using double sided tape and cut the leather piece the size of the pattern. Repeat with the second pattern.

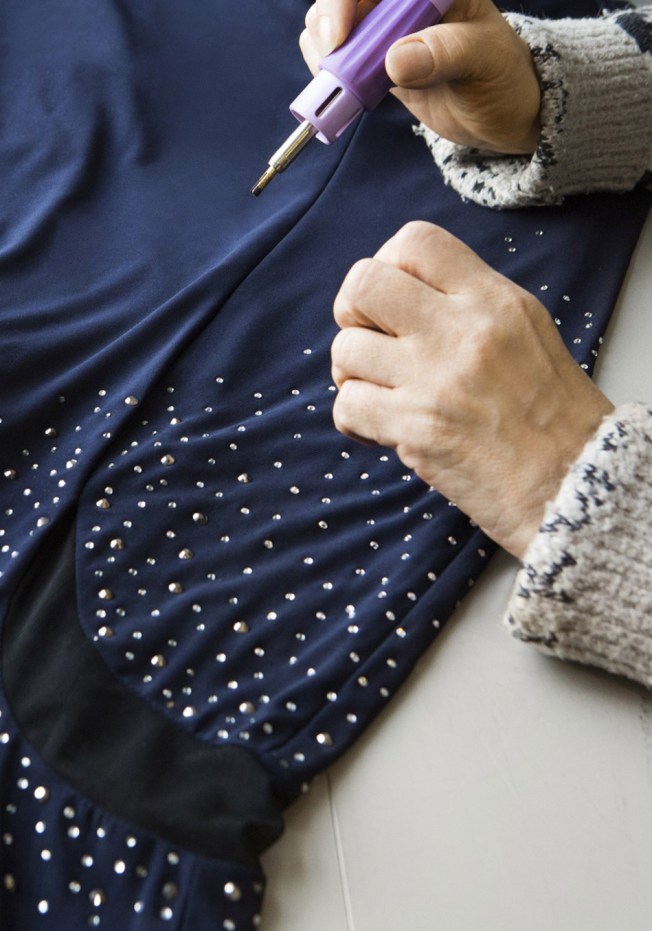
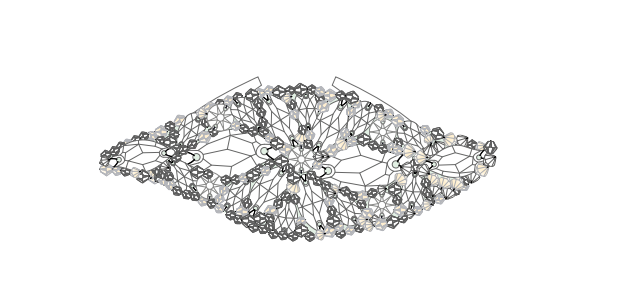
STEP 2: Sew on all Swarovski Crystals in the material list onto the larger leather piece as shown in our illustrations.

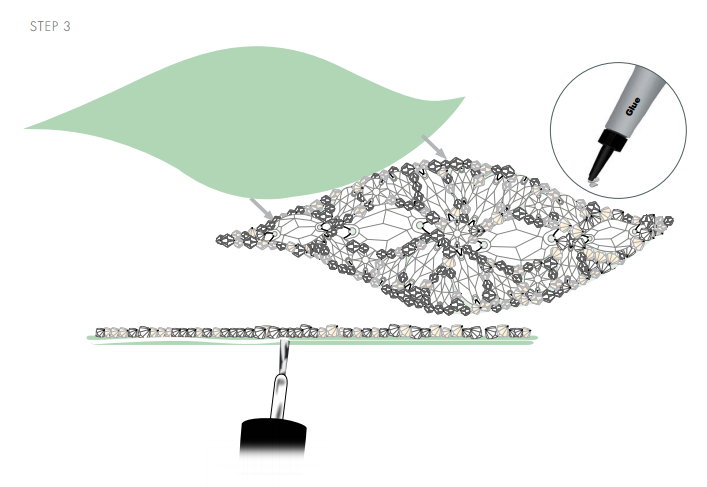
STEP 3: Glue the smaller piece of leather onto the back of the larger crystallized leather piece. Color the edges of the prepared piece with white nail lacquer.

STEP 4: Sew the piece on top of a hairband.

 Swarovski Silk heart bead Wholesale to the Public

Unknown's avatar

Make Mom Feel Extra Special with this Sparkling Mother’s Day Gift Inspiration

Moms special day

Mom’s special day is quickly approaching!

What are you creating for your mom this Mother’s Day? Here is a sparkling design inspiration to spark your creativity.

Show your mother how much she means to you by saying it in crystal: embellish an expression of love with her favorite color of Swarovski crystals on a smooth white background, making this sparkling bangle a thoroughly modern memento of a very special day — one that your mum will keep forever.

DIY Mothers day sparkling bracelet design inspiration

diy-mothers-day-sparkling-bracelet-design-inspiration-header.png

Use Swarovski Crystal 2088 Flatbacks in whatever size you like to use (here is a helpful stone size chart). This bangle was created using the 3ss, but if this is too small for your liking, other popular sizes include the 5ss, 10ss and 12ss which all give nice detail.

The supplies and tools that you will need include: a white bangle, glue (E 6000 is popular or a two part epoxy), a paper tooth pick, transfer film, 12x4cm transfer sheet and tweezers.

DIY Mothers day sparkling bracelet design inspiration Step 1

DIY Mothers day sparkling bracelet design inspiration Step 2

DIY Mothers day sparkling bracelet design inspiration Step 2b

DIY Mothers day sparkling bracelet design inspiration Step 3

DIY Mothers day sparkling bracelet design inspiration Step 4

DIY Mothers day sparkling bracelet design inspiration Step 6

DIY Mothers day sparkling bracelet design inspiration Step 7

STEP 1: Print out the pattern in a 1:1 ratio where the height of the text is 9mm.

STEP 2: Place the transfer sheet over the pattern. Using tweezers or a glue stick, place the Swarovski Flat Back No Hotfix (this bangle used style 2000 SS03 Indian Siam) over the text.

STEP 3: Place the transfer film over the text and pull the transfer film back to get all the crystals on the film as shown in our illustrations with this step.

STEP 4: Apply two part adhesive glue onto the Swarovski Flat back No Hotfix (style 2000 SS03 Indian Siam) with a toothpick.

STEP 5: Affix the transfer film onto the bangle and press the stones gently onto the bangle. Let it cure for the length of the time indicated on the glue package before removing the transfer film.

Give this gift with joy, knowing you made it not only with your hands, but more importantly, with your heart!

Swarovski_5741-Light_Siam Hear Bead

A Mother’s Love is Forever.

Unknown's avatar

Guess Who’s Going To The Bead & Button Show This Year…A Special Sneak Peek Of The Sparkling Display!

Sneak Peak to trade show display from Rainbows of Light

(Picture of the Day from The Telegraph)

I have some FUN news to share with everyone! I will be selling all your favorite Swarovski Crystals at the Bead and Button Show in Milwaukee  this year!! Yay!

Bead and Button Show 2015

Free admission to the show this year starting Friday June 5th  through Sunday the 7th! Print out your free voucher now! I will be at booth #432 Please come by and say Hi, I can’t wait to see everyone!

I have been a very busy little bee lately preparing for this endeavor. It is my very first trade show and I am super excited!

I am a crafty lady and love DIY projects, so I am making as much of the display as I can myself. Here is a sneak peek of my painting and crystallizing projects for my dazzling booth!

Lavendar frames and crystals for tradeshow

My color palette is a variety of lavender/purple hues, silver and cream. Here is a picture frame that I found at the goodwill and painted it with darker and lighter lavender tones and added Swarovski 2088-16ss and 20ss AmethystLight Amethyst and Crystal Flatbacks to the frame. I love how it turned out (the picture doesn’t do it justice). It has an elegant, fun and whimsical feel that I just love!

DIY Lavendar frame and crystal embellished box from Rainbows of Light

I found this frame and little jewelry box at Michael’s. They were both a light unfinished wood color, which I painted and embellished with Swarovski Flatbacks using E6000 to add a touch of feminine sparkle.

DIY painting frames for tradeshow from Rainbows of Light

Here are what the frames used to look like. I scored at the goodwill finding frames from $0.99 to $4.99. All it takes is a little time and energy to paint and crystallize them, but well worth the effort. If I were to buy frames that were already beautified, it would have cost around $30-$50 each. That’s way I love DIY projects so much! It’s fun to be hands-on and creative while saving big bucks, plus you feel so much more accomplished – it’s a win-win!

DIY painting frames and adding Swarovski Crystals

More great frame finds at the goodwill…let the transformation begin!

DIY painting frames and gluing Swarovski Crystals Flatbacks from Rainbows of Light

Crystallizing in the works…It’s such a joy to see my dream coming true!

Tiered Kashi helping paws

I had to sneak in a little picture of Kashi, the best & sweetest little helper around…she’s already tuckered out with how much work we’ve been doing 😉

DIY painting frames and adding Swarovski Crystals Flatbacks from Rainbows of Light

I’m really enjoying this process. It’s extremely rewarding and I’m looking forward to bringing all of these beautiful elements together. I will keep you updated as to how the display is coming together…but even better I would LOVE to meet you in person at the show!

Definitely this is what I am looking forward to the most, is meeting all of our wonderful customers in person! Please, please, please, stop by and say Hi, I will be at booth #432…look for all the sparkles at Rainbows of Light!!

Swarovski_5741-Hear Bead Crystal_Antique_Pink

Looking forward to seeing you soon and until then…sparkle on!

Unknown's avatar

Bring to Light Cherished Moments Captured in Time with This Treasured DIY Design!

DIY Swarovski Crystal Watch Free Design and Instructions

DIY Swarovski Crystal and Pearl Vintage Watch Bracelet Design and Instructions

I love this treasured idea of turning back time and creating a unique watch and sparkling piece of specialized jewelry that has meaning to you every time you look at it! Bring to light cherished moments and memories with a beloved vintage style black-and-white photograph complimented by Swarovski crystals!

Here is what you will need for this precious project and instructions are below:

 Swarovski Crystals and Pearls

Swarovski Crystal 5328 4mm Xilion Bicone Beads 33 pieces of Crystal Iridescent Green 001 IRIG

Swarovski Crystal 5328 4mm Xilion Bicone Beads 33 pieces of Metallic Sunshine 001 METSH

Swarovski Crystal 5810 4mm Pearls 62 pieces of Light Grey Pearls 001 616

Swarovski Crystal 5810 4mm Pearls 31 pieces of White Pearls 001 650

Supplies and Tools

Jewelry elastic cord, transparent, 0.5mm, 2.5m, two part adhesive glue and a watch

Tools

A beading needle and scissors

diy-swarovski-crystal-and-pearl-watch-free-design-and-instructions-step-1.png

diy-swarovski-crystal-and-pearl-watch-free-design-and-instructions-step-3.png

diy-swarovski-crystal-and-pearl-watch-free-design-and-instructions-step-5.png

diy-swarovski-crystal-and-pearl-watch-free-design-and-instructions-step-6.png

STEP 1: Remove the watch strap and the glass on top of the dial. Insert your desired photograph and replace the glass.

STEP 2: Cut 50cm of elastic cord, fold it in half and secure it onto the spring bar of the watch with a double knot. Using a beading needle, insert 31 Swarovski Crystal Pearl art. 5810 4mm Crystal Light Grey Pearl onto the elastic cords, removing one of the cord ends halfway through. (See illustrations for clarification.)

STEP 3: Go through the spring bar at the other end of the watch face with the beaded elastic cord. Insert the cord back through the Swarovski Pearls towards the half way point. Tie a knot as shown in our illustrations with this step.

STEP 4: Put some glue on the knot and thread both the ends of the elastic cord back through three Swarovski Pearls on each side. Cut off the leftover cord ends.

STEP 5: Repeat steps 2–4 four more times to make the other beaded cords for the watch. The second cord from left will be with the 33 Swarovski Bead art. 5000 4mm Crystal Metallic Sunshine. The third cord consists of 31 Swarovski Pearl art. 5810 4mm Crystal White Pearl. The fourth cord consists of 33 Swarovski Bead art. 5000 4mm Crystal Iridescent Green and the last cord will be 31 Swarovski Pearl art. 5810 4mm Crystal Light Grey Pearls.

Swarovski_5741-Hear Bead Crystal_Antique_Pink

This would be a particularly exceptional Mother’s Day or Birthday gift for that special loved one in your life!

I would love to see a picture of your unique watch when you make it!