Unknown's avatar

As a Designer, Ask Yourself This One Meaningful Question…

beautiful-english-garden

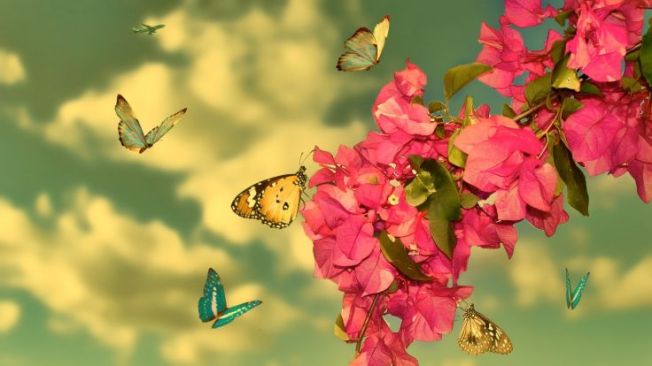
(Photo compliments of Beautiful English Garden)

Today I fell in love with this simple, yet genuinely profound idea that can affect many aspects of our lives. Now, I don’t mean to be dramatic about it, but I think it’s important to take a moment and to honestly think about this worthwhile question.

The question is…why does beauty matter?

Beautiful butterflies

There are all kinds of answers to this question. A few that I have been reflecting on, is that beauty inspires us. Beauty helps us to pause and reflect on the joyous qualities of life. Beauty brings us happiness. Beauty is an expression of love.

I suppose a follow up question would be, where do you create or appreciate beauty in your everyday life?

Why Beauty Matters

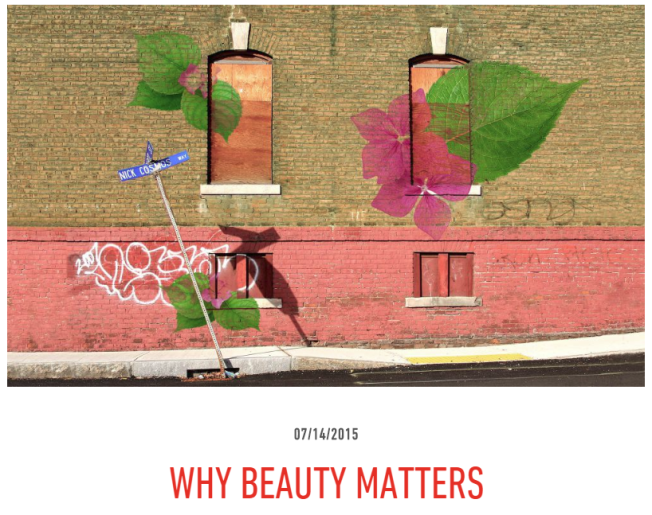
This picture and short article from Ideas.Ted.com is what inspired these thoughts on beauty.

Beauty should be the starting point for everything

Beauty can be found in everything….and I mean everything. It can be found in the smallest, most unassuming elements of life. It can be found in your morning cup of delicious coffee. It can be found in a single rose petal. It can be found in the words we say…or don’t say.

When I really started to amplify this idea and apply it to my life, I began thinking about the smallest details that I see and do every single day. Details that are beautiful and the details that could be made more beautiful.

DIY Beautiful Jewelry Organizers

The obvious beauty is how we dress, the jewelry we wear, the home we create. Maybe less obvious, is how we treat others, how we treat ourselves, our inner and outer vocabulary, and the tone of our voice. It’s always good to remember that everything we say and do has it’s effect in this world.

As we incorporate more beauty in our lives and become more aware of the beauty all around us, we in-turn become more beautiful.

See-The-Beauty-Of-Everyday-Things

(compliments of PictureQuotes.com)

We as designers need to truly remember that, it’s not just the end product of what we make that is beautiful. The process of making that product is also beautiful. The inspiration behind our creations, is beautiful.

Every time someone compliments your jewelry, that becomes a beautiful moment. We are creating and spreading beauty every step of the way, and that in-of-itself, is absolutely beautiful!

Swarovski Crystal Heart Beads 5741-Blush_Rose

Please share your thoughts/pictures on how or why beauty matters to you!

Unknown's avatar

DIY Swarovski Sandals ~ Sparkle Every Step of the Way!

DIY Swarovski Crystal Flip Flops Design and Instructions

Step out in style this summer in charming boho-chic sandals. Raise your fashion game with gorgeous easy-to-apply Swarovski crystals in leaf patterns, which catch the light as you sit sipping something cool and refreshing. From sunrise to sunset, beach to barbecue, slip them on with your sunglasses and get that carefree holiday feeling!

DIY Swarovski Crystal Flip Flops Design and Instructions Banner

Swarovski crystals

Article Product Group Article No. Amount Size Color Color Code

Pearshape Fancy Stones 4320 20 pieces 8x6mm Crystal Iridescent Green 001 IRIG

Pearshape Fancy Stones 4320 4 pieces 14x10mm Crystal Gold Patina 001 GOLPA

Trilliant Fancy Stones 4706 4 pieces. 12mm Dark Moss Green 260 Settings 4320/S 20 pieces 8x6mm Gold 1 PH2OZ Settings 4320/S 4 pieces 14x10mm Gold 1 PH2OZ Settings 4706/S 4 pieces 12mm Gold 1 PH2OZ

Globe Beads 5028/4 24 pieces 6mm Fern Green 291 (or you can use style 5000 Round Beads)

Bicone Beads 5328 34 pieces 4mm Dark Moss Green 260

Bicone Beads 5328 62 pieces 4mm Olivine 228

Supplies & Tools

Supplies: Alcantara, black, 20x18cm Fusible Interlining, 20x9cm Nylon thread, transparent, 0.15mm, 6m

Tools: Double sided tape, Iron, Scissors, Sewing needle, Sheet of paper, and Tweezers.

DIY Swarovski Crystal Flip Flops Design and Instructions Step 1

DIY Swarovski Crystal Flip Flops Design and Instructions Step 2

DIY Swarovski Crystal Flip Flops Design and Instructions Step 2 B

DIY Swarovski Crystal Flip Flops Design and Instructions Step 3

DIY Swarovski Crystal Flip Flops Design and Instructions Step 4

DIY Swarovski Crystal Flip Flops Design and Instructions Step 5

DIY Swarovski Crystal Flip Flops Design and Instructions Step 6

STEP 1: Print and cut out the leaf pattern.

STEP 2: Cut two 20x9cm pieces of Alcantara fabric and cut a 20x9cm piece of fusible interlining. Place the interlining between the two pieces of Alcantara and iron the 3 layers together.

STEP 3: Adhere the pattern to the fabric with double sided tape and cut out the shape. Flip the pattern and cut out a mirror piece of the fabric. (See illustrations for clarification.)

STEP 4: Insert Swarovski Fancy Stones art. 4320 8x6mm, 14x10mm and art.4706 12mm into Swarovski Settings as shown in this step using tweezers. Cut 1m nylon thread and sew half of the Swarovski Crystals in the material list onto one of the pattern pieces. Sew the other half onto the other pattern piece.

STEP 5: Sew the created leaves onto the sandals as depicted in the illustrations

Swarovski_Heart_Bead_5741-Crystal_Paradise_Shine

Have fun sparkling every step of the way!

Unknown's avatar

Get Your Crafty Kicks On This 4th of July & Celebrate CHUCKS “GLORY DAYS”

DIY 4th of July Chuck Taylor Swarovski Crystal Shoes

Add a little twinkle to your toes with a pair of statement sneakers. Finish off your high-tops with eye-catching Swarovski crystals sewn on to patriotic red, white and blue for some extra Fourth of July sparkle. And when Independence Day celebrations are over, wear them to make every day a dazzle day!

DIY Swarovski Crystal Chuck Taylor shoes with Swarovski Crystals

Swarovski crystals

Swarovski 3288 – 8mm 42 pieces Crystal Sew-on Stones

Swarovski 3288 – 10mm 3 pieces Crystal Sew-on Stones

Supplies & Tools

White sewing thread, red and blue fabric paint. Carboard, 3x3cm Paint brush, a pencil, a ruler, scissors and a sewing needle.

DIY Swarovski Crystal Chuck Taylor Shoes design and instructions

DIY Swarovski Crystal Chuck Taylor Shoes design and instructions page 2

DIY Swarovski Crystal Chuck Taylor Shoes design and instructions page 3

DIY Swarovski Crystal Chuck Taylor Shoes design and instructions page 4

DIY Swarovski Crystal Chuck Taylor Shoes design and instructions page 5

DIY Swarovski Crystal Chuck Taylor Shoes design and instructions banner

STEP 1: Use our pattern or draw a 2cm star onto a cardboard as shown in our illustrations with this step.

STEP 2: Use the cardboard star template and a pencil to draw stars all around one of the shoes. Draw horizontal lines around the other shoe with a pencil to make 1.5cm wide stripes.

STEP 3: Paint the horizontal stripes on the one shoe in red and the background around the stars of the other shoe in blue.

STEP 4: Tie a double knot onto a sewing thread and sew Swarovski Sew-on Stones 3288 8mm Crystal on top of the red stripes. (Do not pierce through to the inside of the shoe with the needle and thread). Repeat the steps with the horizontal rows and the stars as shown in the illustration and material list.

Swarovski_5741 Heart Bead Light_Siam

Unknown's avatar

Sparkle as You Walk Down the Aisle with These Stunning DIY Embellished Shoes!

Wedding bouquet

Gorgeous bridal bouquet from Style Me Pretty

Once in a blue moon, in the middle of an ordinary life, love comes along and catapults you into a fairy tale. Make the most of it! Sparkle with Swarovski crystals as you walk down the aisle. Twinkle as you dance the night away and shine as you hug your guests.

DIY Swarovski Crystal Wedding Shoes

These beautifully DIY Swarovski embellished shoes will complement your wedding dress as you take the first steps of your married life.

DIY Swarovski Crystal Wedding Shoes banner

Please contact us for items not listed on line, we can certainly order them for you and the setting are very inexpensive.

Article Product Group Article No. Amount Size Color Color Code

Swarovski Crystal Fancy Stones 4200 Navette 14pcs. 11x3mm Crystal 001

Swarovski Crystal Fancy Stones 4228 Xilion Navette 16pcs. 15x7mm White Opal 234

Swarovski Crystal Fancy Stones 4230 Lemon 2pcs. 19x12mm Crystal 001

Swarovski Crystal Fancy Stones 4328 Xilion Pear 16pcs. 8×4.8mm Crystal 001

Swarovski Crystal Fancy Stones 4328 Xilion Pear 16pcs. 10x6mm Crystal 001

Settings 4200/S 1PH2OH 14pcs. 11x3mm Rhodium

Settings 4228/S 1PH2OH 16pcs. 15x7mm Rhodium

Settings 4230/S 1PH2OH 2pcs. 19x12mm Rhodium

Settings 4328/S 16pcs. 8×4.8mm Rhodium

Settings 4328/S 16pcs. 10x6mm Rhodium Ceralun (A+B) Sys.# 5011395 White SP 300

DIY Swarovski Crystal Wedding Shoes Step 1

DIY Swarovski Crystal Wedding Shoes Step 2

DIY Swarovski Crystal Wedding Shoes Step 3

DIY Swarovski Crystal Elegant Wedding Shoes

STEP 1: Place Swarovski Fancy Stone art. 4228 15x7mm White Opal into the Swarovski Settings art. 4228/S 1PH2OH 15x7mm Rhodium and gently close the prongs over the stone using tweezers. Repeat the step with all other Swarovski Crystals in the material list.

STEP 2: Mix the Swarovski Ceralun® according to the package instructions. Affix the Swarovski Settings with Swarovski Fancy stones onto the shoe using the Swarovski Ceralun®. Please note that you have to glue one half of the shoe first, let it dry and then glue the other half as shown in our illustrations with this step.

STEP 3: Repeat the steps 1-2 to create the other wedding shoe.

Have fun creating these stunning shoes!

Swarovski Love Bead

Unknown's avatar

Guess Who’s Going To The Bead & Button Show This Year…A Special Sneak Peek Of The Sparkling Display!

Sneak Peak to trade show display from Rainbows of Light

(Picture of the Day from The Telegraph)

I have some FUN news to share with everyone! I will be selling all your favorite Swarovski Crystals at the Bead and Button Show in Milwaukee  this year!! Yay!

Bead and Button Show 2015

Free admission to the show this year starting Friday June 5th  through Sunday the 7th! Print out your free voucher now! I will be at booth #432 Please come by and say Hi, I can’t wait to see everyone!

I have been a very busy little bee lately preparing for this endeavor. It is my very first trade show and I am super excited!

I am a crafty lady and love DIY projects, so I am making as much of the display as I can myself. Here is a sneak peek of my painting and crystallizing projects for my dazzling booth!

Lavendar frames and crystals for tradeshow

My color palette is a variety of lavender/purple hues, silver and cream. Here is a picture frame that I found at the goodwill and painted it with darker and lighter lavender tones and added Swarovski 2088-16ss and 20ss AmethystLight Amethyst and Crystal Flatbacks to the frame. I love how it turned out (the picture doesn’t do it justice). It has an elegant, fun and whimsical feel that I just love!

DIY Lavendar frame and crystal embellished box from Rainbows of Light

I found this frame and little jewelry box at Michael’s. They were both a light unfinished wood color, which I painted and embellished with Swarovski Flatbacks using E6000 to add a touch of feminine sparkle.

DIY painting frames for tradeshow from Rainbows of Light

Here are what the frames used to look like. I scored at the goodwill finding frames from $0.99 to $4.99. All it takes is a little time and energy to paint and crystallize them, but well worth the effort. If I were to buy frames that were already beautified, it would have cost around $30-$50 each. That’s way I love DIY projects so much! It’s fun to be hands-on and creative while saving big bucks, plus you feel so much more accomplished – it’s a win-win!

DIY painting frames and adding Swarovski Crystals

More great frame finds at the goodwill…let the transformation begin!

DIY painting frames and gluing Swarovski Crystals Flatbacks from Rainbows of Light

Crystallizing in the works…It’s such a joy to see my dream coming true!

Tiered Kashi helping paws

I had to sneak in a little picture of Kashi, the best & sweetest little helper around…she’s already tuckered out with how much work we’ve been doing 😉

DIY painting frames and adding Swarovski Crystals Flatbacks from Rainbows of Light

I’m really enjoying this process. It’s extremely rewarding and I’m looking forward to bringing all of these beautiful elements together. I will keep you updated as to how the display is coming together…but even better I would LOVE to meet you in person at the show!

Definitely this is what I am looking forward to the most, is meeting all of our wonderful customers in person! Please, please, please, stop by and say Hi, I will be at booth #432…look for all the sparkles at Rainbows of Light!!

Swarovski_5741-Hear Bead Crystal_Antique_Pink

Looking forward to seeing you soon and until then…sparkle on!